Purchase Links Project Kit (KIT33) – Full Materials List:
Vesgantti 100″ Faux Leather Couch – Buy Here
Crystal Floor Graphic Layer / Floor Decal(Alternative): Buy Here
Clear Epoxy Resin (Base Pour – 1 gal per 40 sq ft): Buy Here
Resin Topcoat / Wear Layer (High Gloss): Buy Here
Self-Leveling Compound: Buy Here
Subfloor Primer + Patch Compound: Buy Here
Mixing Buckets + Stir Paddles: Buy Here
Notched Squeegee + Spiked Roller: Buy Here & Buy Here
Heat Gun / Torch (Bubble Removal): Buy Here
Warm LED Lighting / Bulbs: Buy Here
Coffee Table + Decor (Similar Style – Alternative): Buy Here
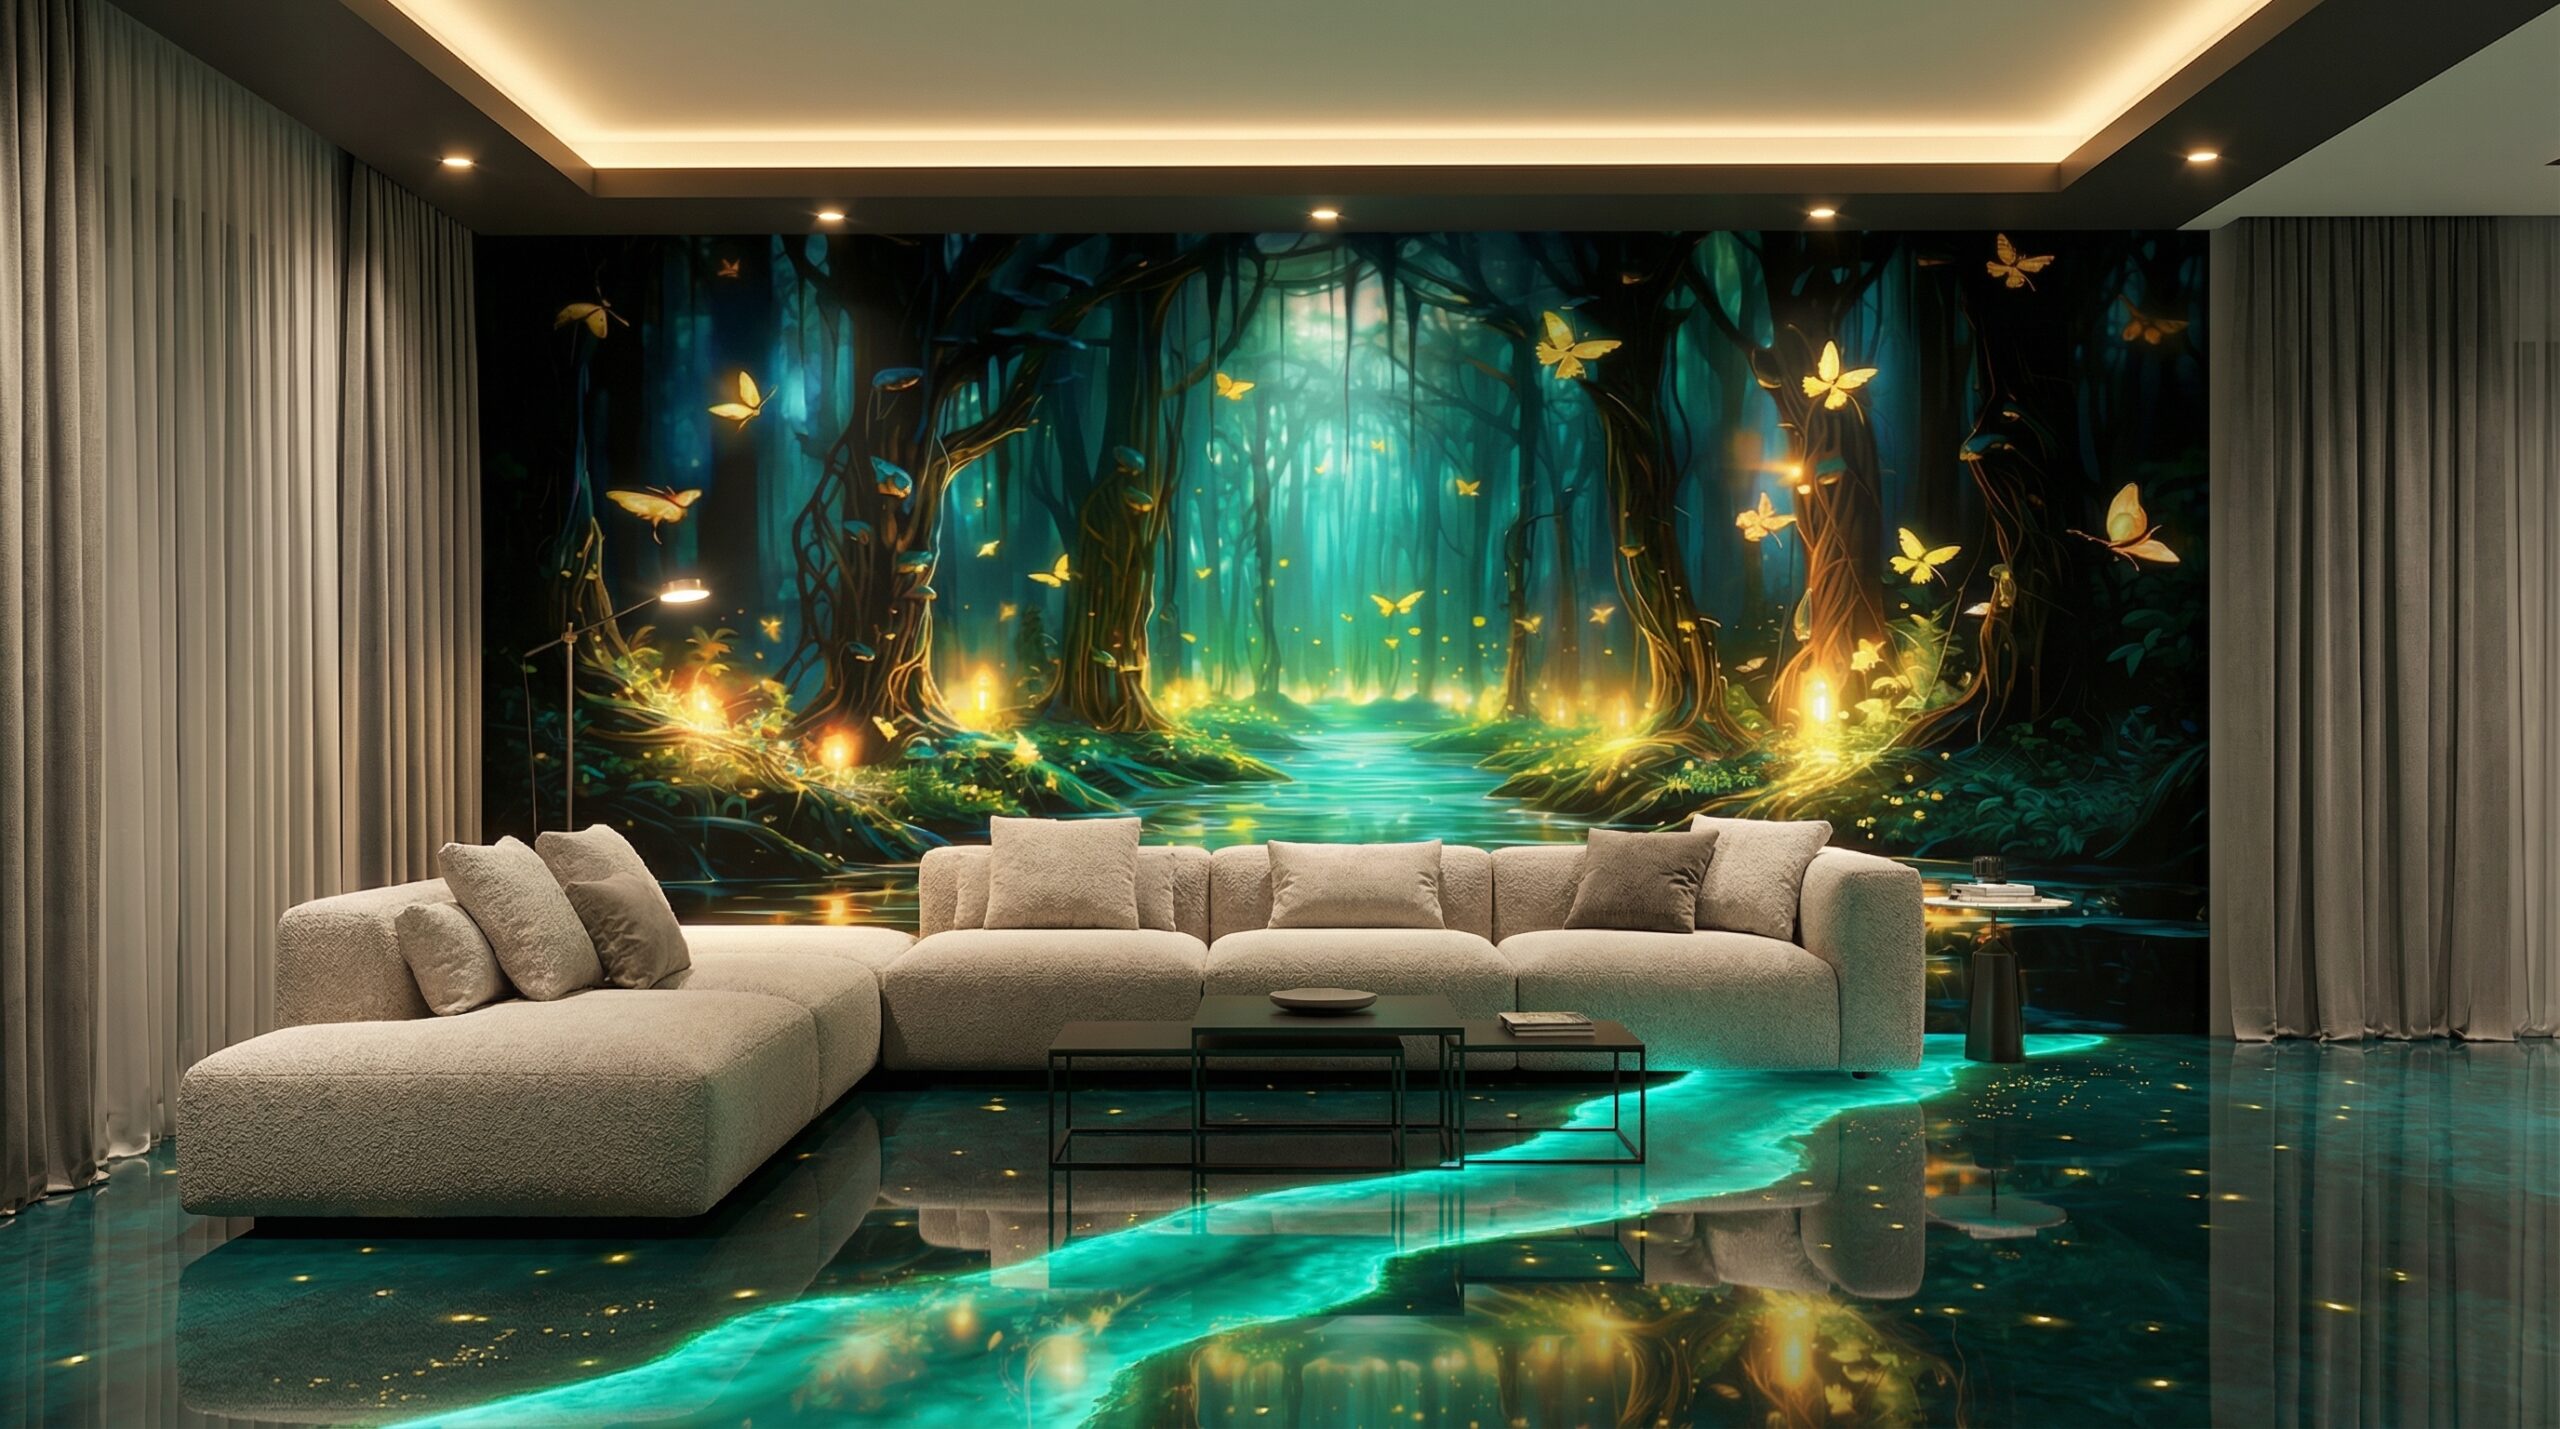
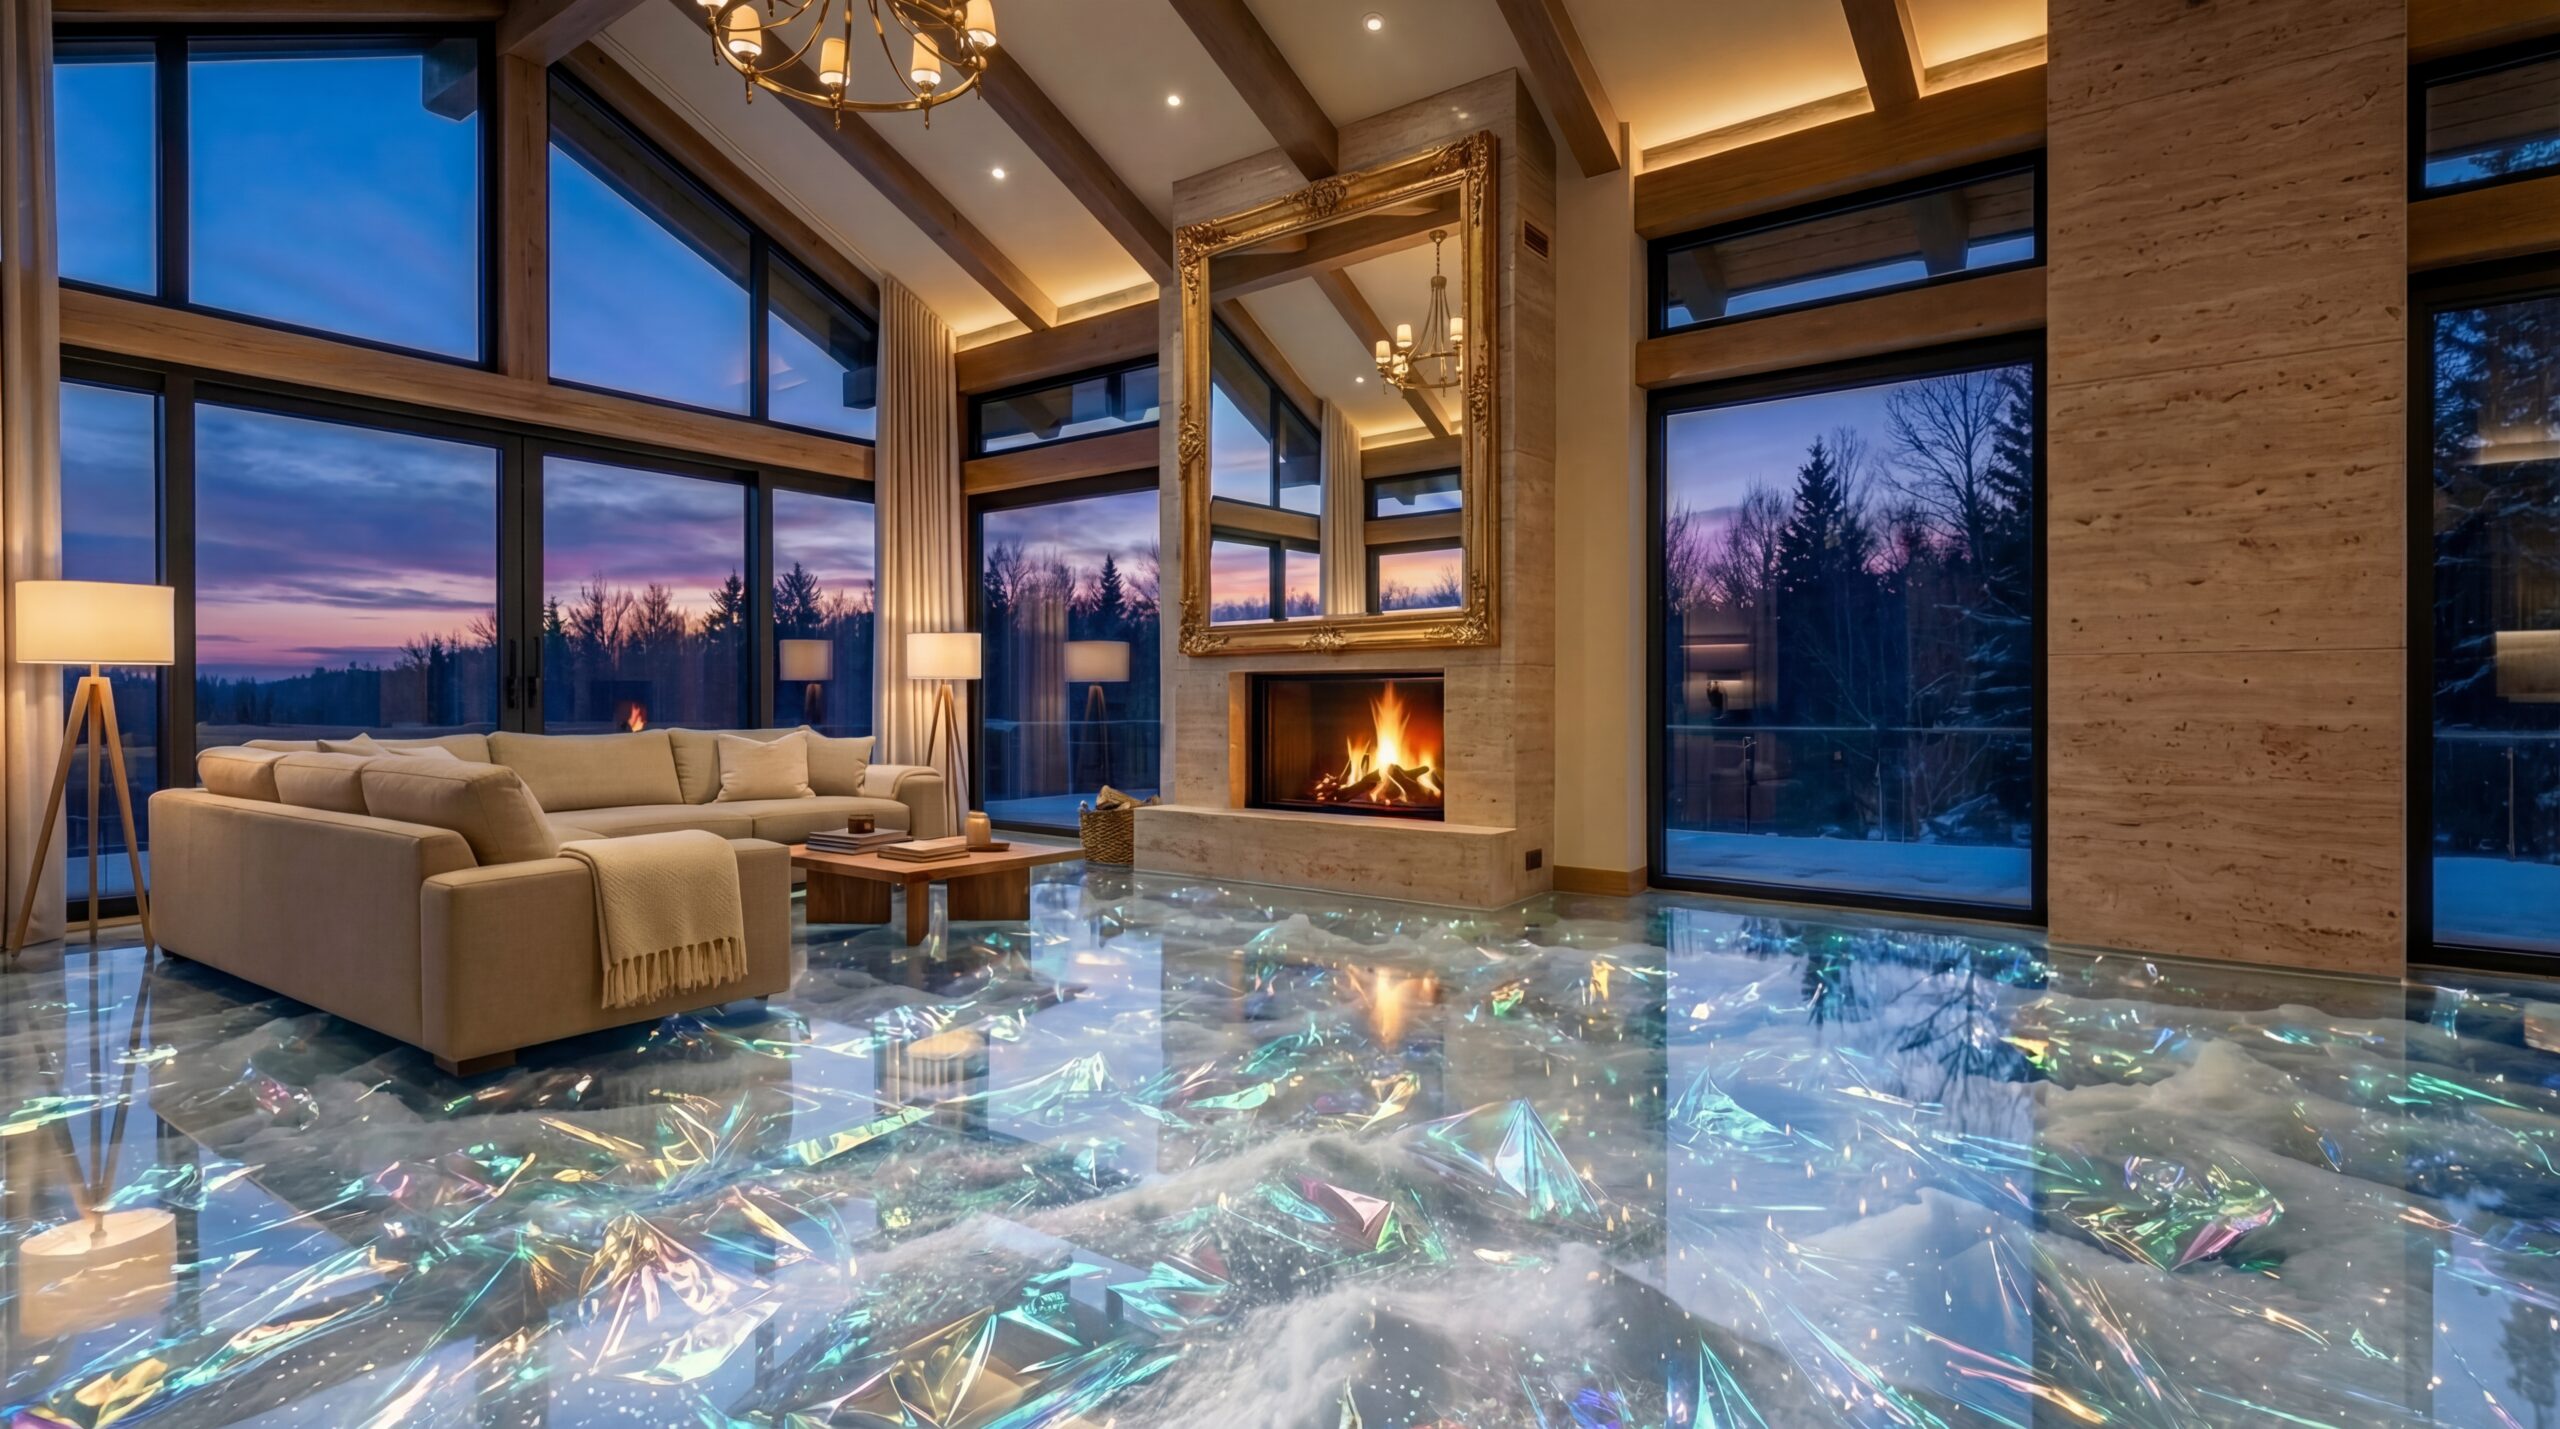
There’s nothing like a dramatic before-and-after to prove how much a room can change without altering the structure. In Project 33, we transformed a lounge that had a dated green carpet into a clean, modern space anchored by a glossy 3D crystal-look resin floor, warm ambient lighting, and a cosy neutral seating setup that instantly upgrades the whole vibe.
Step 1: Remove the Old Carpet (Fast, Clean Demo)
The first stage is all about getting back to a solid base. The carpet is cut into manageable strips, rolled up, and removed along with the underlay and tack strips. This is where neatness matters: clear the room, bag debris as you go, and vacuum thoroughly. A clean starting point makes the rest of the process smoother and helps prevent bumps telegraphing through the final resin finish.
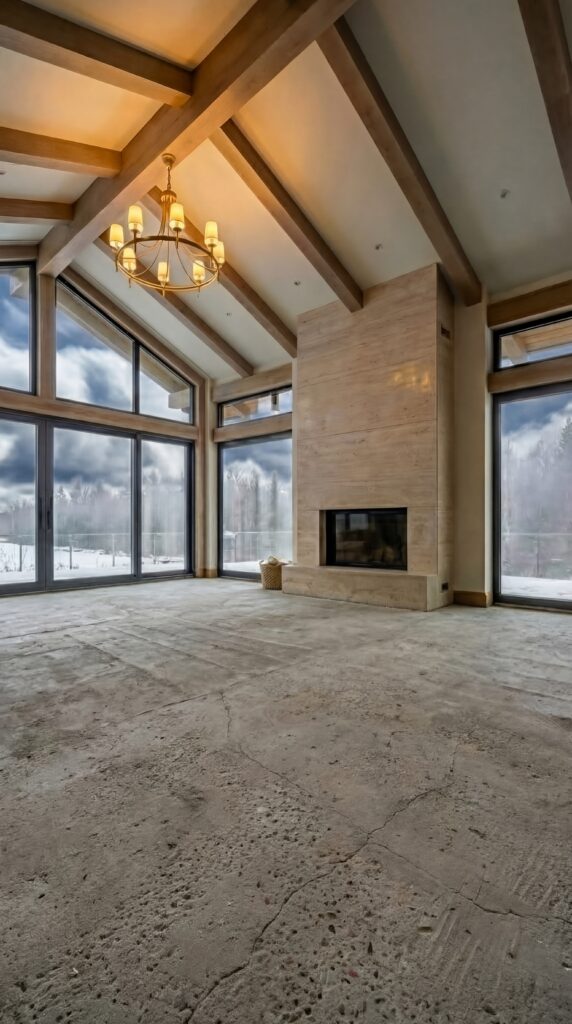
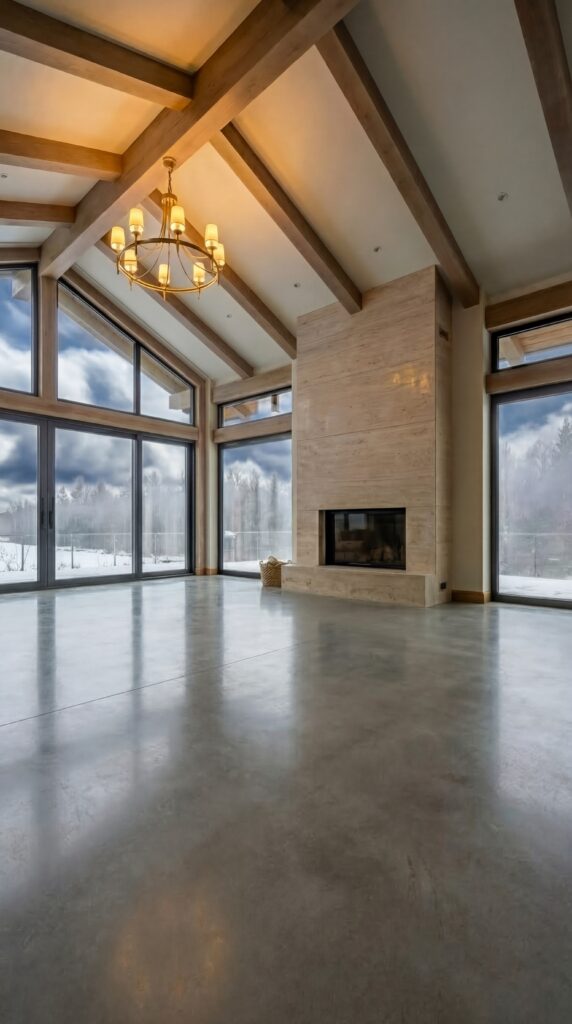
Step 2: Prep and Level the Subfloor
A premium resin floor is only as good as what’s underneath it. Any cracks, dips, or uneven sections are patched, then the surface is cleaned and primed. From there, a self-leveling compound is poured and feathered out to create a flat, consistent foundation. This step is crucial because it’s what gives the final resin floor that seamless, “glass sheet” look.
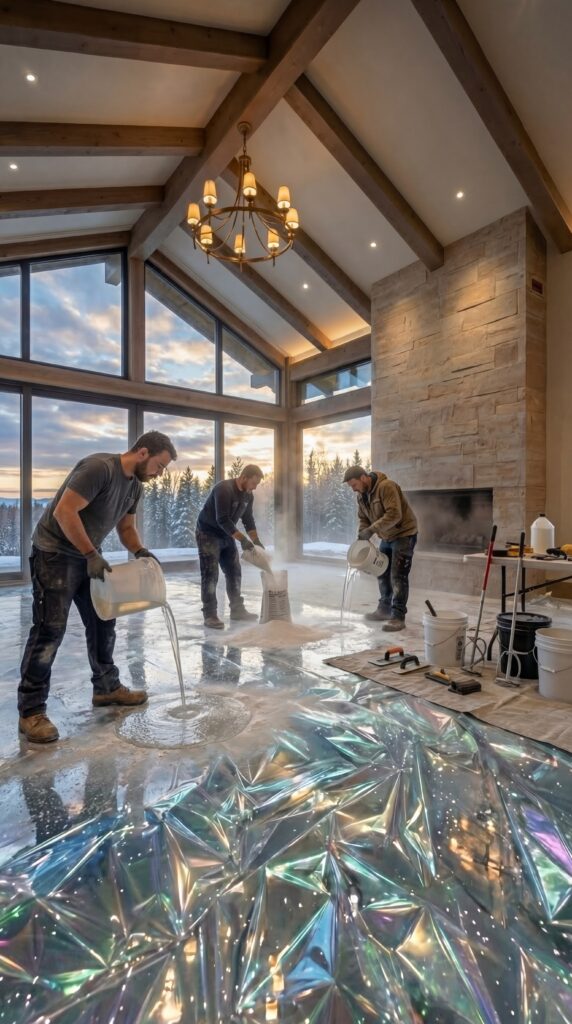
Step 3: Install the 3D Crystal Layer + Resin Pour
With the base level, the 3D crystal/ice visual layer is aligned carefully so the artwork reads as one continuous design. Edges are taped and sealed, then the clear epoxy resin is mixed and poured. The resin is spread evenly using a notched squeegee and roller, and bubbles are removed with gentle heat. As it settles, the floor gains depth, clarity, and those signature reflections that make this style so striking.
Step 4: Topcoat, Finish, and Style the Room
After curing, a final clear wear-layer topcoat locks in shine and durability. Then comes the most satisfying part: styling. The cream sectional couch becomes the hero, balanced with a coffee table, warm lamps, and subtle ambient lighting that reflects beautifully across the resin surface. The end result feels modern, cosy, and high-end—without needing a full rebuild.

Final Thoughts
If you’ve been thinking about a lounge makeover, this is proof that flooring and lighting can completely rewrite a space. Want the exact product list we used? Check the affiliate links at the top and the Project Kit for 33.
👉 Like, subscribe, and comment “RESIN” if you want a full step-by-step breakdown and tips to avoid common resin flooring mistakes.